 Hakanai
 Custom Domain
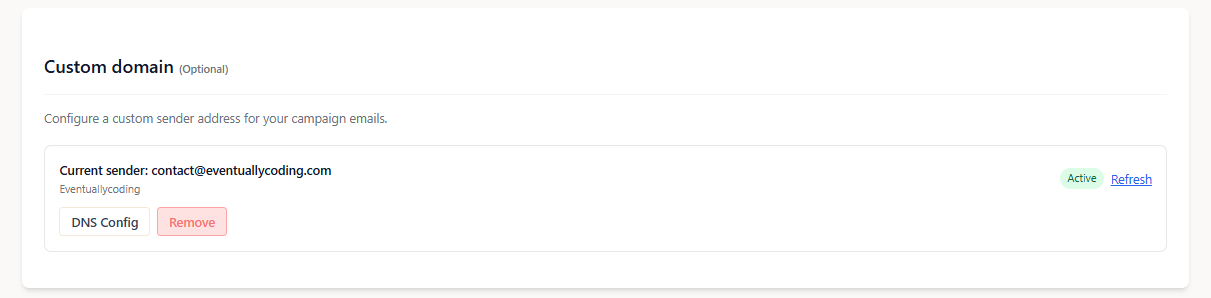
Understanding Custom Domain Setup
By default, newsletters are sent from contact@hakanai.io. With custom domain configuration, you can send newsletters from your own domain (e.g., newsletter@yourcompany.com), making your emails appear more professional and trustworthy to your subscribers.
Why Use a Custom Domain?
- Brand consistency: Emails appear to come directly from your organization
- Improved deliverability: Your domain reputation affects email delivery rates
- Professional appearance: Recipients see your branded email address
- Trust building: Subscribers recognize emails as coming from your authentic source
Setting Up Your Custom Domain
Step 1: Configure Your Sender Address
In your campaign settings, navigate to the Custom Domain section and specify:
- Sender email: The email address you want to use (e.g.,
newsletter@yourcompany.com) - Sender name: The display name recipients will see (e.g., "Your Company Newsletter")
Step 2: DNS Configuration
After adding your sender address, you'll receive DNS records that must be added to your domain:
DKIM Records (Required)
Two DKIM records ensure email authentication:
brevo1._domainkey.yourcompany.com → CNAME → b1.yourcompany-com.dkim.brevo.com
brevo2._domainkey.yourcompany.com → CNAME → b2.yourcompany-com.dkim.brevo.com
Domain Ownership Verification (Required)
A TXT record proves you control the domain:
yourcompany.com → TXT → brevo-code:xxxxxxxxxxxx
Step 3: Validation
After adding the DNS records:
- Click "Refresh" in the custom domain configuration
- The system will check if records are properly configured
- Status will change from "Pending" to "Active" when verification is complete
It may take up to 48 hours for DNS changes to propagate worldwide, though they're often active within a few minutes.
DNS Record Status
The configuration panel shows the status of each DNS record:
- Pending: Record hasn't been added to your DNS
- Active: Record is properly set up and verified
Tips
- DNS propagation time: DNS changes can take up to 48 hours to propagate worldwide, though they're often active within a few hours
- Keep records active: Don't remove the DNS records once configured, as this will break email authentication
- Monitor deliverability: Watch your email open rates and delivery statistics after switching to a custom domain
Troubleshooting
Common Issues
"Domain not configured" error
- Verify DNS records are added exactly as shown
- Check with your DNS provider about propagation time
- Ensure there are no typos in the record values
"Authentication failed" status
- Confirm both DKIM records are properly configured
- Verify the ownership verification record is set up
- Try the "Refresh" button after making DNS changes
Emails not being delivered
- Check that your domain has a good reputation
- Ensure your domain isn't on any email blacklists
- Verify all DNS records show "Configured" status
Getting Help
If you encounter issues:
- Double-check the DNS records match exactly what's shown in your configuration
- Contact your DNS provider for assistance with adding records
- Use online DNS checker tools to verify your records are publicly visible
- Try the "Refresh" button after making DNS changes
- Contact our support team for assistance (contact@hakanai.io)
Security Considerations
- DKIM authentication: The configured DKIM records ensure recipients can verify emails actually came from your domain
- Domain reputation: Your custom domain's email reputation will affect deliverability
- Access control: Only configure custom domains for domains you fully control
By properly configuring a custom domain, you'll enhance your newsletter's professional appearance and potentially improve email deliverability to your subscribers.